
Welcome to the ultimate beginner’s guide on how to digitize for embroidery. If you’ve ever marveled at a complex, beautifully stitched logo or piece of art and wondered, “How did they turn a picture into that?”, you’ve come to the right place. The magic behind that transformation is called digitizing, and it’s a skill that bridges the gap between digital art and physical creation. Learning this process is the single most empowering step you can take to unlock the full potential of your embroidery machine.
This guide is designed for the aspiring creator. We will demystify the entire process, from understanding the core concepts to choosing the right embroidery software, and provide a clear, step-by-step workflow. Whether you want to create custom designs for your business, gifts for friends, or simply bring your own artistic ideas to life in thread, understanding how to digitize for embroidery is your key to creative freedom. Forget being limited to pre-made designs; it’s time to become the creator.
We’ll break down the technical jargon, explain the essential principles, and walk you through a basic project, ensuring you leave with the confidence to start your digitizing journey today.
What Exactly is Embroidery Digitizing?
Before we dive into the “how,” it’s crucial to understand the “what.” Embroidery digitizing is not a simple file conversion. You cannot just take a JPG or PNG image, click “convert,” and expect a perfect embroidery file.
Embroidery digitizing is the manual process of plotting stitch-by-stitch instructions that an embroidery machine can read. A digitizer uses specialized embroidery digitizing software to meticulously trace an image and assign different stitch types (like run, satin, and fill stitches) to various parts of the design. They must also define stitch direction, density, and the order in which each element will be sewn.
Think of it like this:
-
An artist creates a painting with different brush strokes.
-
A digitizer creates an embroidery design with different stitch types.
Each decision a digitizer makes impacts the final quality, texture, and durability of the embroidered product. This is why a well-digitized file from a professional looks infinitely better than one created by an automatic “one-click” tool.
Key Takeaway: Digitizing is a creative and technical skill, not an automatic process. It involves manually translating a visual design into a language of stitches using dedicated embroidery software.
The Essential Toolkit: What You Need to Start Digitizing
To begin your journey, you need more than just ambition. You need the right tools and the right foundation. Let’s break down the essentials.
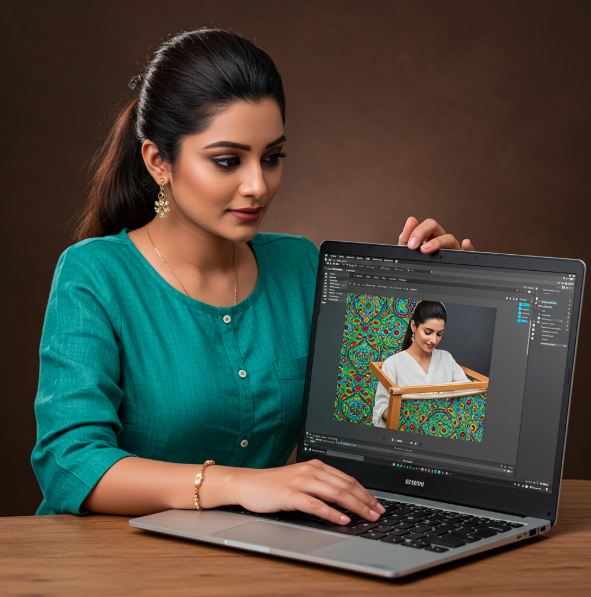
1. Choosing the Right Embroidery Digitizing Software
Your software is your digital workshop. It’s where all the magic happens. The market is filled with options, from free programs with limited capabilities to professional-grade suites. Here’s a general breakdown:
-
Auto-Digitizing Software: These programs claim to convert images automatically. While they can be a starting point, they often produce messy, inefficient, and low-quality results that require significant manual cleanup. They are not recommended for serious work.
-
Manual Digitizing Software: This is the real deal. This type of embroidery design software gives you full control over every single stitch. You manually trace the artwork and make all the critical decisions about stitch types, density, and pathing. The learning curve is steeper, but the results are professional and fully customizable.
For those serious about learning how to digitize for embroidery, investing in robust manual software is non-negotiable. It’s the difference between being a passenger and being the pilot.
ALT Text: A graphic showing how to digitize for embroidery, with an original vector art on one side and the digitized stitch file on the other.
2. Starting with High-Quality Artwork
The quality of your final embroidery is directly tied to the quality of your source image. The principle of “garbage in, garbage out” applies perfectly here.
-
Vector Art (Recommended): Vector files (like .AI, .EPS, .SVG) are created with mathematical lines and curves. They can be scaled to any size without losing quality. They have clean, defined edges, making them the ideal format for digitizing.
-
Raster Art (Usable, but with caution): Raster files (like .JPG, .PNG, .BMP) are made of pixels. When you zoom in, they become blurry and jagged. If you must use a raster image, make sure it is high-resolution (300 DPI is a good standard) and has clean, clear lines. You will likely spend more time cleaning it up within your embroidery software.
For an in-depth explanation of the difference, Adobe offers a great article on Raster vs. Vector.
Key Takeaway: Your success depends on two things: powerful manual embroidery digitizing software and clean, high-resolution source artwork. Prioritize vector files whenever possible.
The Core Principles of Good Digitizing
Before we walk through the steps, you need to understand the fundamental theories. A machine only does what it’s told; these principles are how you tell it what to do correctly.
1. Stitch Types: Your Building Blocks
Every design is a combination of three basic stitch types:
-
Run Stitch (or Straight Stitch): A single line of stitches. Used for outlines, fine details, and as a foundational underlay.
-
Satin Stitch: A series of back-and-forth stitches that form a smooth, “satin-like” column. Perfect for borders, lettering, and small shapes.
-
Fill Stitch (or Tatami Stitch): A pattern of run stitches used to cover large areas with color. You can control the pattern and angle to create different textures.
2. The Importance of Underlay
Underlay is a hidden layer of stitches (usually run stitches) sewn before the main “top” stitches. It has two critical jobs:
-
Stabilizes the Fabric: It tacks the fabric to the stabilizer, preventing it from shifting or stretching during the embroidery process.
-
Provides a Foundation: It gives the top stitches a smooth, raised surface to sit on, preventing them from sinking into the fabric (especially on fleece or knits) and making the final design look bold and crisp. Never skip the underlay!
3. Push and Pull Compensation
This is a more advanced concept, but it’s vital. When the needle and thread work on fabric, they create tension.
-
Pull: The tension of the stitches tends to pull the fabric inward, making shapes sew out slightly narrower than you digitized them. To counteract this, you must digitize satin columns slightly wider than you want them to be. This is Pull Compensation.
-
Push: The force of the needle penetrating the fabric can push the edges of a fill area outward, especially at the end of the rows. This is Push Compensation.
Good embroidery digitizing software will have automatic settings for this, but manual adjustment is often needed for perfect results.
4. Efficient Pathing
Pathing is the route the machine takes to sew the design. Good pathing minimizes “jumps” (where the machine stops, trims the thread, and moves to a new area) and “trims.” An efficient path travels logically from one element to the next, often hiding run stitches underneath larger fill areas. This saves time, reduces thread waste, and results in a cleaner final product.
Key Takeaway: To master how to digitize for embroidery, you must think like an embroidery machine. Plan your stitch types, always use underlay, account for fabric distortion with pull compensation, and create a logical, efficient path.
A Step-by-Step Guide: How to Digitize for Embroidery (A Basic Workflow)
Let’s put theory into practice. Here is a simplified workflow for digitizing a basic shape, like a solid heart, using a manual embroidery digitizing software.
Step 1: Import Your Artwork
Open your software and import your clean vector or high-res raster image of a heart. Lock it in the background so you can’t accidentally move it while you trace.
Step 2: Set Your Hoop and Fabric
Select the hoop size you will be using and, if your software has this feature, choose a fabric profile (e.g., “Cotton,” “Knit,” “Fleece”). This will help the software apply appropriate default settings for underlay and compensation.
Step 3: Digitize the Fill Area
-
Select your “Fill Stitch” or “Complex Fill” tool.
-
Carefully trace the outline of the heart by clicking points around its edge.
-
Once the shape is closed, finalize it (often with an “Enter” key press).
-
Go to the object’s properties. Set the stitch angle (e.g., 45 degrees), density, and ensure an appropriate underlay (like a grid or edge-run underlay) is active.
Step 4: Digitize the Border
-
Select your “Satin Stitch” or “Column” tool.
-
Trace a border around the heart, just on top of the fill area. You will click points along the inside edge and then the outside edge to define the width of the column.
-
In the properties, check the stitch density and apply pull compensation to make it slightly wider than it appears on screen.
Step 5: Review and Sequence Objects
Look at your object list. The machine will sew in the order shown. For our heart, the order should be:
-
Heart Fill
-
Heart Border
This ensures the border sews on top of the fill, creating a clean, crisp edge. If they are in the wrong order, simply drag and drop to re-sequence them. This is a critical step in learning how to digitize for embroidery.
Step 6: Run a Stitch Simulator
This is your final check. Use the software’s built-in stitch simulator to watch a virtual stitch-out of your design. Look for:
-
Inefficient pathing or unnecessary jumps.
-
Areas that look too dense or too sparse.
-
Gaps between the fill and the border.
-
Correct sequencing.
Step 7: Export the File
Once you are satisfied, export the design in the correct file format for your specific embroidery machine (e.g., .PES for Brother, .DST for Tajima, .JEF for Janome, etc.).
Key Takeaway: Follow a logical workflow: Import -> Set Up -> Digitize from largest areas to smallest details -> Sequence -> Simulate -> Export. This structured approach prevents mistakes.
Common Mistakes Beginners Make (and How to Avoid Them)
-
Digitizing Too Dense: More stitches are not always better. Overly dense designs are stiff, pucker the fabric, and are prone to thread breaks. Start with your software’s default density and adjust as needed.
-
Forgetting Underlay: This is the #1 beginner mistake. It leads to gappy, uneven designs that sink into the fabric. Always use underlay.
-
Ignoring Pathing: A design with dozens of unnecessary jumps and trims looks amateur and takes forever to sew. Plan your path to flow smoothly.
-
Using Low-Quality Art: Trying to digitize a blurry, low-resolution image is a recipe for frustration and poor results. Start with the best possible artwork.
-
Not Doing a Test Sew-Out: The simulator is great, but nothing beats a real-world test. Always stitch your design on a scrap piece of the same fabric before committing to your final garment. For more troubleshooting, a community like the Embroidery Subrddit can be a great resource for seeing real-world examples.
Frequently Asked Questions (FAQs)
Q1: What is the best embroidery software for a beginner?
A: The “best” is subjective, but a great choice is software that is powerful yet intuitive. Look for programs with strong manual tools but also helpful wizards and fabric profiles. Programs like PE-Design 11 are excellent because they offer a complete suite of tools that a beginner can grow into, making it a long-term investment.
Q2: Can I digitize for embroidery for free?
A: There are free software options, but they are typically very limited in their manual digitizing capabilities. They are fine for learning the absolute basics, but you will quickly hit a wall. For quality results, investing in a paid embroidery digitizing software is essential.
Q3: How long does it take to learn how to digitize for embroidery?
A: You can learn the basic tools in a few hours. You can become competent with a few weeks of consistent practice. However, mastering digitizing is a lifelong journey. Every fabric and design presents a new challenge, which is part of the fun!
Conclusion: Your Journey as a Digitizer Starts Now
Learning how to digitize for embroidery is like learning a new language—the language of thread. It takes patience, practice, and a willingness to learn from your mistakes. By understanding the core principles of stitch types, underlay, compensation, and pathing, you are no longer just an embroidery machine operator; you are a designer. You have the power to translate any idea from your screen into a tangible, textured piece of art.
To truly excel, you need tools that won’t hold you back. You need an embroidery digitizing software that provides professional-level control and grows with you as your skills advance. That’s why we confidently recommend PE-Design 11. It’s an all-in-one solution packed with the advanced features that professionals rely on, presented in a way that is accessible to new digitizers.
The best part? You can forget about the stress of ongoing monthly fees. PE-Design 11 is available as a lifetime version with a single, one-time payment. This is a permanent investment in your craft, your business, and your boundless creativity.
Ready to stop searching for designs and start creating your own? Visit our official website at https://pe-design11.com/ to see everything PE-Design 11 has to offer and secure your lifetime license. The next great design is waiting for you to create it.