Appliqué is a timeless embroidery technique that adds personality, color, and texture to any project. It involves stitching pieces of decorative fabric onto a base fabric to create a layered design, perfect for everything from custom quilt labels and monogrammed towels to fun characters on children’s clothing.1
While the process might seem complex, PE-Design 11 includes a powerful Appliqué Wizard that automates the most difficult steps, making it incredibly easy to create professional-quality appliqués from almost any shape or text.2 This guide will walk you through exactly how to use this feature to unlock your creativity.
Understanding the Magic of Appliqué: The Three Core Stitches
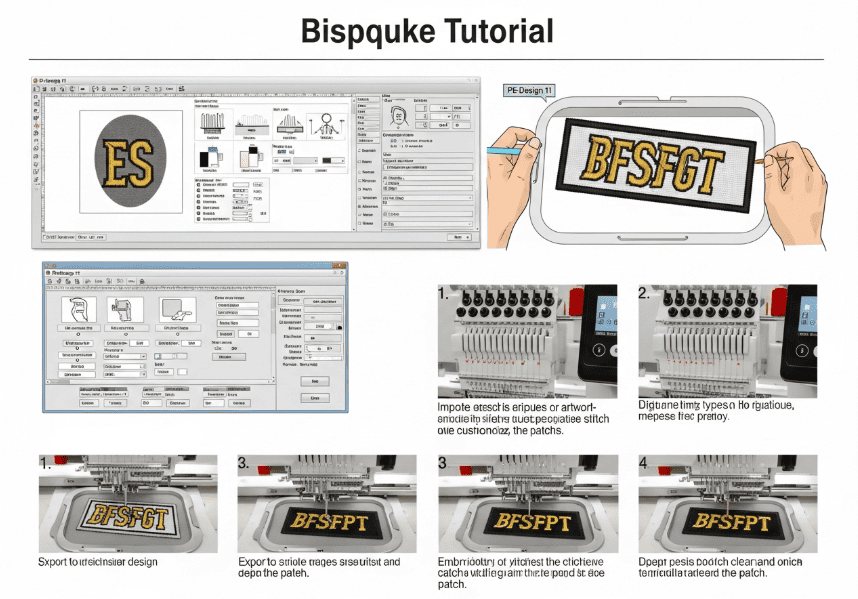
Before diving into the wizard, it’s helpful to understand the three-step stitch process that defines appliqué. The wizard will create these three distinct stitch sequences for you automatically.4
- The Placement Line: A simple running stitch that sews directly onto your base fabric. Its only job is to show you exactly where to place your piece of appliqué fabric.
- The Tack-Down Stitch: A second running stitch (or sometimes a light zigzag) that sews your appliqué fabric onto the base fabric, securing it in place. After this step, you trim away the excess fabric.
- The Covering Stitch: A wide, dense stitch, typically a Satin Stitch or Zigzag Stitch, that sews over the raw edge of your trimmed appliqué fabric. This creates a clean, beautiful, and durable border.
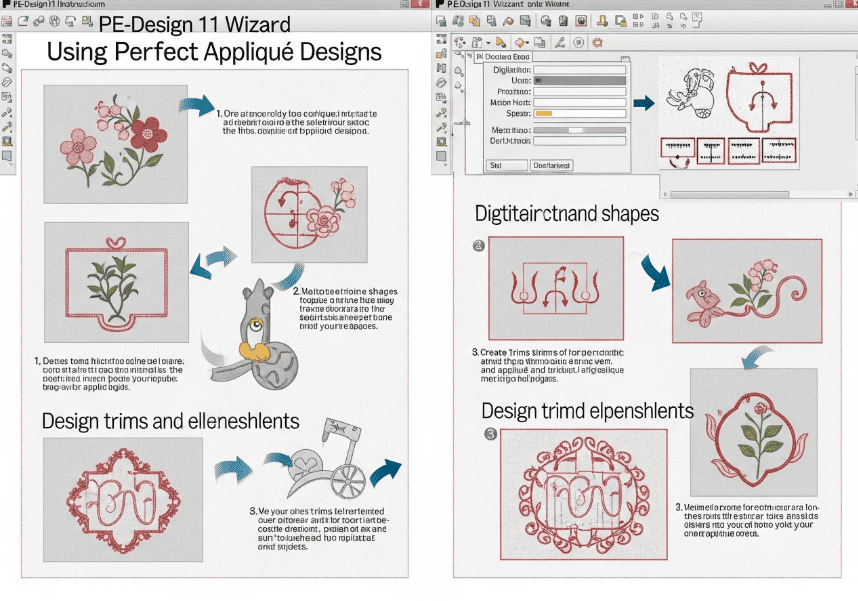
Using the Appliqué Wizard: From Shape to Stitches
The Appliqué Wizard works with any closed shape, whether it’s a built-in shape, text, or a custom shape you’ve drawn yourself.
Step 1: Create or Select Your Shape
First, you need a shape to convert.
- For Built-in Shapes: Go to the [Home] tab, click ****, and select a shape from the dropdown menu. Click and drag on the design page to draw your shape.
- For Text: Select the **** tool and type your desired letters. Built-in fonts work best for this process.5
Step 2: Launch the Appliqué Wizard
Once your shape is on the design page, select it by clicking on it. With the shape selected, navigate to the [Home] tab and click the [Appliqué Wizard] icon.4
Note: If the Appliqué Wizard icon is greyed out, it means you either haven’t selected a shape, or the shape you’ve drawn is not a closed object.5
Step 3: Configure Your Appliqué Settings
The wizard dialog box gives you full control over how your appliqué will be constructed.3
- Covering Stitch: This is the most important setting. You can choose the type of stitch that will cover the raw edges. A Satin Stitch or Zigzag Stitch is most common. You can also set the Width (how wide the border will be) and the Density (how close together the stitches are).4 A good starting point for a satin stitch is 3.0mm wide.
- Tack down: This option lets you choose the stitch that will hold your fabric down for trimming. A simple running stitch or a light V-Stitch works well.3
- Applique Material: This setting creates the initial placement line. You can choose to have it sew a running stitch or, if you have a compatible cutting machine, to create a cutting line.3
- Output Pattern: For most cases, you will want to select ****. This converts your original shape’s outline into the appliqué finishing stitch.3
Once you click [OK], the wizard will automatically generate the three appliqué steps in your **** pane.4
Creating Appliqué from Custom Shapes
The real power of the wizard comes from using your own custom designs. You can use the drawing tools under the **** tab to draw any shape you like.
The most important rule is that your shape must be a closed outline. If you draw a line that doesn’t connect back to its starting point, the software won’t recognize it as a region that can be turned into an appliqué, and the wizard will remain greyed out.4 Once you have a closed shape, simply select it and follow the same steps to launch the Appliqué Wizard.
Pro-Tips for Perfect Appliqué
- Integrate with ScanNCut: PE-Design 11 is compatible with Brother ScanNCut cutting machines.6 You can export the appliqué shape as an FCM file, which allows your ScanNCut to perfectly pre-cut your fabric pieces. This eliminates the need for manual trimming and guarantees perfect results every time.
- Use a Topper on Napped Fabrics: If you are creating an appliqué on a high-pile fabric like fleece or terry cloth, use a water-soluble stabilizer on top of your project. This prevents the finishing stitches from sinking into the fabric and disappearing.
- Stabilize Your Base Fabric: Appliqué designs have a higher stitch count than simple outlines. Always use an appropriate stabilizer (like a cut-away or tear-away) on your base fabric to prevent puckering and distortion.
Frequently Asked Questions (FAQs)
Why is the Appliqué Wizard icon greyed out?
This almost always means one of two things: you either have not selected a shape on the design page, or the shape you have selected is not a closed object (its start and end points don’t connect).5
Can I turn a complex design with multiple parts into an appliqué?
Yes. You can select multiple objects at once and use the Appliqué Wizard. The software is smart enough to handle multiple objects and will create the necessary appliqué steps for each part.
My finishing stitches aren’t covering the raw edges of my fabric. What went wrong?
This is a common issue that can have a few causes. First, you may not have trimmed your appliqué fabric close enough to the tack-down stitch. Second, your covering stitch may not be wide enough. Try increasing the [Width] of your Satin or Zigzag stitch in the Appliqué Wizard settings to ensure it fully covers the edge.